

Why “Aging in Place” Is More Than a Buzzword — It’s a Plan
When I started covering lifestyle topics 16 years ago, the phrase “aging in place” barely registered in mainstream conversations. Today, it’s one of the most searched terms among Americans over 50 — and for good reason. According to AARP, nearly 90% of adults aged 65 and older say they want to remain in their current home as they age. That’s not a trend. That’s a near-universal preference.
But wanting to stay in your home and being able to stay safely are two very different things. The Centers for Disease Control and Prevention reports that one in four Americans aged 65 and older falls each year, and the home is where most of those falls happen. The good news? Most of the dangers are fixable — often affordably — if you approach modifications with a clear plan.
In this guide, I’ll walk you through exactly how to modify your home to age in place, room by room, decision by decision. Think of this as a conversation with a friend who’s done the research so you don’t have to start from scratch.
Start With an Honest Home Assessment
Before you spend a single dollar, walk through your home with fresh eyes. I tell my readers to pretend they’re visiting for the first time — as a 75- or 80-year-old version of themselves. What would trip you up? What would be hard to reach? Where would you feel unsteady?
Better yet, bring someone with you. An occupational therapist who specializes in home evaluations can conduct a professional assessment, typically costing between $200 and $500. The National Council on Aging maintains resources to help you find certified aging-in-place specialists in your area.
Key Questions to Ask During Your Walkthrough
- Can you enter your home without navigating steps, or is there a step-free alternative?
- Are hallways and doorways wide enough for a walker or wheelchair (at least 36 inches)?
- Is there a full bathroom on the main floor?
- Can you reach frequently used kitchen items without a step stool?
- Is lighting adequate in stairways, bathrooms, and the path between your bedroom and bathroom?
- Are floor surfaces consistent — no transitions between carpet and tile that could catch a toe?
Write everything down. Rank each issue by urgency (safety hazard now vs. convenience upgrade for later). This list becomes your renovation roadmap.
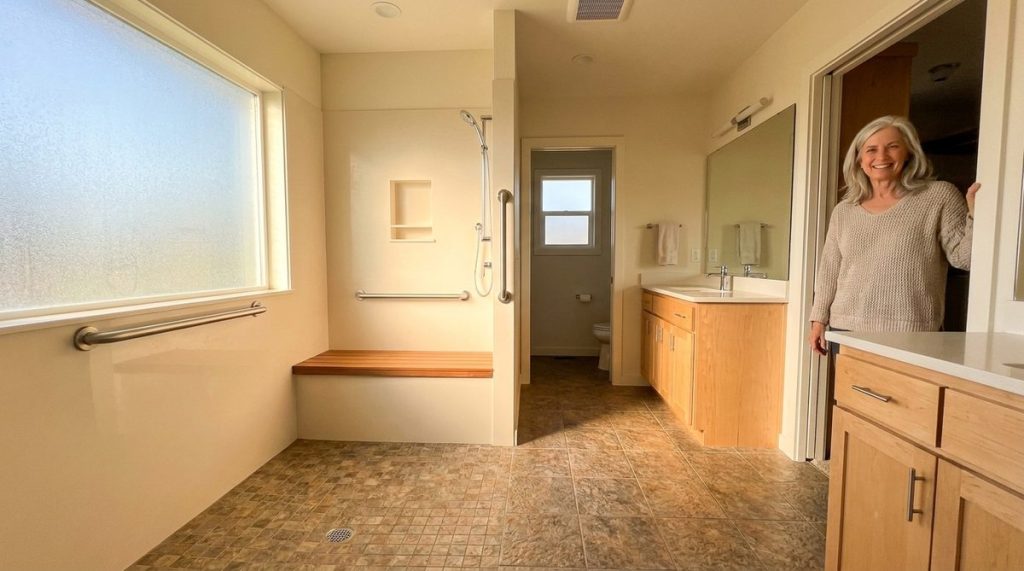
The Bathroom: Your First Priority
If you modify only one room, make it the bathroom. It’s the single most dangerous room in the house for older adults. Wet surfaces, hard edges, awkward movements getting in and out of a tub — the risks are real and well-documented.
Walk-In Showers Over Bathtubs
Replacing a standard bathtub with a curbless or low-threshold walk-in shower is the single highest-impact modification I’ve seen recommended by every occupational therapist and contractor I’ve interviewed over the years. The national average cost runs between $2,500 and $8,000 depending on your layout, tile choices, and local labor rates.
A zero-threshold shower eliminates the need to step over a tub wall — the movement that causes the most bathroom falls. Add a built-in bench seat and a handheld showerhead on a slide bar, and you’ve created a bathing space that’s both safer and more comfortable.
Grab Bars Are Non-Negotiable
I cannot overstate this: grab bars save lives. Install them next to the toilet, inside the shower, and near the tub if you’re keeping one. Professional installation typically costs $100 to $250 per bar, and today’s options are a far cry from the institutional-looking bars of the past. Companies like Moen and Delta offer grab bars that double as towel bars or shelf supports — attractive enough that visitors won’t even notice they’re safety features.
One critical detail: grab bars must be anchored into wall studs or reinforced with blocking behind the drywall. A bar screwed only into drywall will pull out under body weight. If you’re not confident in your DIY skills here, hire a professional. This isn’t the place to cut corners.
Additional Bathroom Modifications Worth Considering
- Comfort-height toilet (17 to 19 inches rather than the standard 15 inches) — about $200 to $400 installed
- Non-slip flooring or textured tile — $3 to $12 per square foot depending on material
- Lever-style faucet handles instead of round knobs (easier for arthritic hands)
- Motion-activated nightlights for middle-of-the-night trips
For a deeper dive into specific costs, check out our guide on 5 Home Modifications for Aging in Place: Real Costs in 2025.
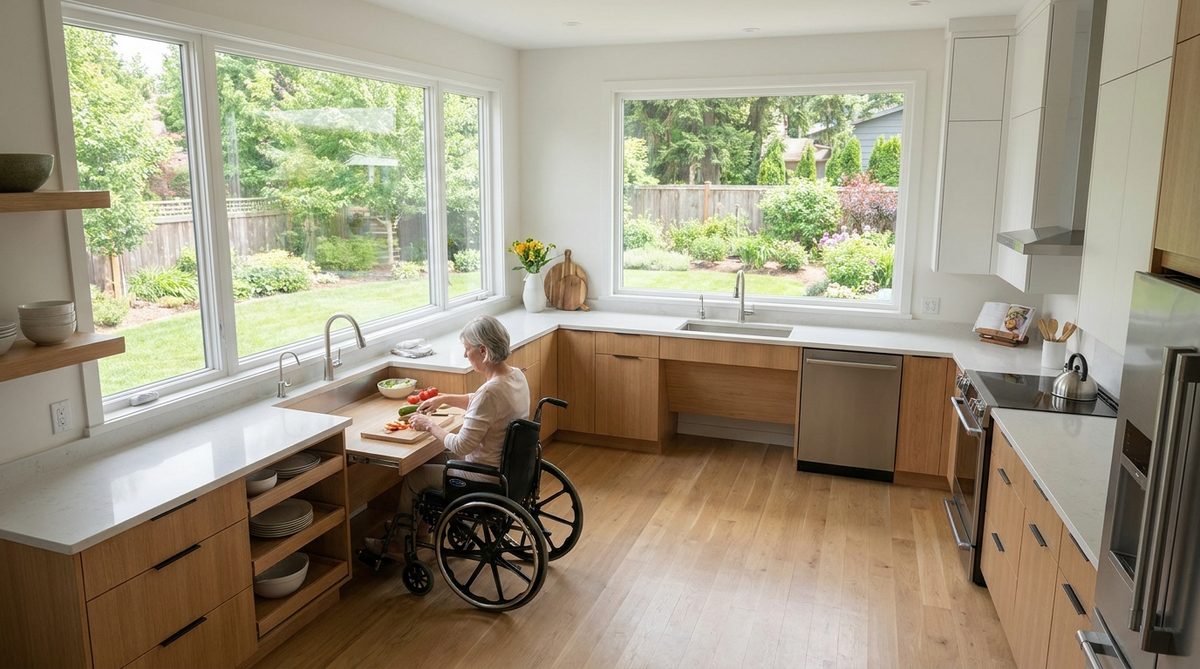
The Kitchen: Where Independence Lives
The kitchen is where you nourish yourself — literally and emotionally. Losing the ability to prepare your own meals is one of the leading reasons older adults eventually move to assisted living. Smart modifications can keep you cooking confidently for years longer than you might expect.
Rethink Your Storage
The biggest kitchen issue I see with my readers over 50 isn’t fancy appliances or countertop height — it’s unreachable cabinets. If your everyday dishes, spices, and cooking tools are stored above shoulder height, you’re reaching and stretching dozens of times a day. That’s a fall waiting to happen.
- Install pull-down shelving systems inside upper cabinets (Rev-A-Shelf makes several models, ranging from $150 to $400 per cabinet)
- Add pull-out drawers to lower cabinets so you’re not kneeling and rummaging in deep spaces
- Relocate everyday items — plates, glasses, coffee mugs — to countertop level or lower cabinets
- Consider a wall-mounted pot rack at accessible height if you have heavy cookware stored overhead
Countertops and Workspace
Standard countertop height is 36 inches, which works well for most people. But if you anticipate using a wheelchair or seated workspace in the future, consider creating at least one lowered counter section at 30 to 34 inches. This can double as a comfortable prep area and an accessible eating spot.
If a full kitchen remodel isn’t in the budget, even small changes help. Replacing round cabinet knobs with D-shaped pulls costs under $5 per handle and makes a meaningful difference for anyone with grip issues or arthritis.
Lighting and Appliance Safety
Under-cabinet LED strip lighting is inexpensive (often under $30 for a full run) and dramatically improves visibility on countertops and cutting surfaces. If your cooktop has hard-to-read dials, consider adding large-print overlay labels or switching to an induction cooktop, which only heats when a pan is present and significantly reduces burn risk.
Entryways, Hallways, and the Path Through Your Home
Think of your home as a series of paths — from the front door to the kitchen, from the bedroom to the bathroom, from the living room to the garage. Every one of those paths needs to be clear, well-lit, and free of tripping hazards.
Eliminate Step Barriers at Entries
A single step at your front door or garage entry can become a serious obstacle. A concrete or wooden ramp with proper slope (the ADA recommends no steeper than 1:12, meaning one inch of rise per 12 inches of ramp length) typically costs $1,000 to $3,500 depending on length and materials.
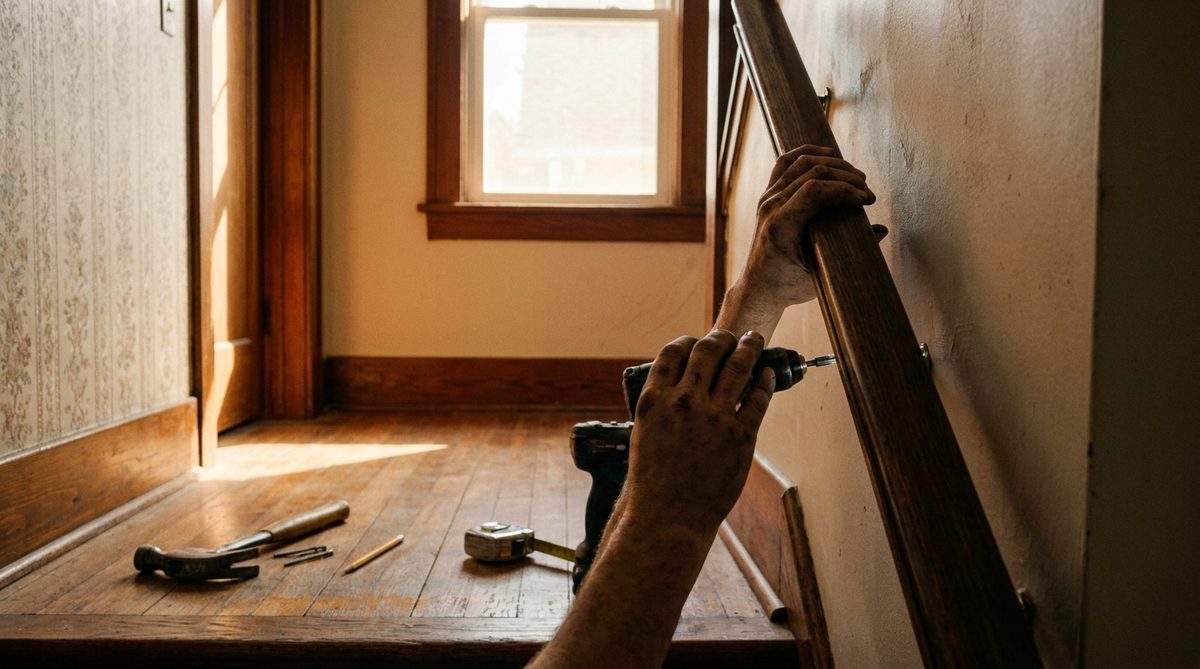
If a ramp feels like too much right now, even adding a sturdy handrail on both sides of your entry steps makes a substantial difference. The key word is “both sides” — I often see homes with a railing on only one side, which doesn’t help if your stronger hand is on the opposite side.
Flooring Matters More Than You Think
Loose throw rugs are the number-one tripping hazard inside American homes. Full stop. Remove them or secure them with industrial-strength double-sided tape. If you love the look of area rugs, choose low-pile options with non-skid backing and tape every edge.
For permanent flooring, luxury vinyl plank (LVP) has become the go-to recommendation from both Better Homes & Gardens and aging-in-place specialists alike. It’s slip-resistant, water-resistant, softer underfoot than tile (which matters if you do fall), and available in attractive wood-look finishes. Installed costs average $3 to $7 per square foot.
Widen Doorways When Possible
Standard interior doorways are 28 to 30 inches wide. A wheelchair requires at least 32 inches of clear passage, and 36 inches is ideal. Widening a doorway typically costs $300 to $1,000 per opening. If that’s not feasible, offset hinges (also called swing-clear hinges) can add an extra two inches of clearance for about $15 to $30 per door — a remarkably effective low-cost fix.
Lighting: The Modification People Forget
Here’s something I’ve learned after 16 years covering these topics: lighting upgrades are the most overlooked and most cost-effective aging-in-place modifications. A 60-year-old eye needs roughly three times more light than a 20-year-old eye to see the same details. By age 75, that figure climbs even higher.
- Replace 60-watt equivalent bulbs with 100-watt equivalent LEDs in high-traffic areas
- Add motion-sensor lights in hallways, closets, bathrooms, and stairways
- Install illuminated light switches (the kind with a small LED glow) so you can find them in the dark
- Place battery-powered LED puck lights inside closets and pantries — they’re about $3 each
- Ensure outdoor paths, porches, and driveways are brightly lit with dusk-to-dawn fixtures
Total cost for a whole-home lighting upgrade? Often under $200 in materials if you’re doing it yourself. That’s an extraordinary return on a very small investment.
Smart Home Technology That Actually Helps
I’m cautious about recommending technology for the sake of technology — what I see most often is people buying gadgets that end up unused in a drawer. But certain smart home tools genuinely make aging in place easier and safer.
Voice Assistants
An Amazon Echo or Google Nest device lets you set medication reminders, make hands-free phone calls, control lights, lock doors, and even call for help — all by voice. For someone with mobility or vision challenges, this is transformative. A basic smart speaker costs $30 to $50.
Smart Door Locks and Video Doorbells
Fumbling with keys is annoying at any age, but it’s genuinely difficult with arthritis or reduced dexterity. A keypad or smart lock lets you enter a code or use a smartphone app. A video doorbell like Ring or Nest lets you see and speak with visitors without walking to the door. These devices also provide a layer of security — an important consideration given the rise in scams targeting older adults. If you’re concerned about digital safety, our article on Elder Fraud Rising: How Seniors Can Stop AI-Powered Scams covers practical protective steps.
Medical Alert Systems
Modern medical alert devices have evolved well beyond the bulky pendant of decades past. Companies like Medical Guardian and Bay Alarm Medical offer wearable devices with fall detection, GPS tracking, and two-way communication — starting around $20 to $35 per month. If you live alone, this is one of the smartest investments you can make.
Plan for the Bedroom You’ll Actually Use
If your home’s only bedrooms are upstairs, it’s time to think about a main-floor sleeping option. This doesn’t necessarily mean a full renovation. I’ve spoken with dozens of readers who successfully converted a den, formal dining room, or home office into a comfortable bedroom.
The essentials: proximity to a full bathroom (ideally with the modifications described above), adequate closet or storage space, room for a bed that’s the right height (typically 20 to 23 inches from floor to mattress top for easy sit-to-stand transitions), and good lighting.
If stairs are still manageable now but you want a backup plan, consider installing a stair lift. Straight stair lifts cost $2,000 to $5,000 installed; curved models run $8,000 to $15,000. Alternatively, some homeowners plan ahead by roughing in an elevator shaft during a remodel — the structural work can be done now relatively affordably, with the elevator installed later if needed.
How to Pay for Home Modifications
Budget is a legitimate concern. Social Security covers basic living expenses for many retirees, and there’s not always a surplus for renovations. Understanding what retirees actually take home from Social Security in 2026 can help you plan realistically.
That said, several funding sources exist specifically for aging-in-place modifications:
- Medicaid Home and Community-Based Services (HCBS) Waivers: Available in most states, these can cover certain modifications for qualifying individuals. Contact your state Medicaid office for details.
- USDA Rural Development Loans and Grants: If you live in a rural area, you may qualify for low-interest loans or grants up to $10,000 for home repairs and accessibility modifications.
- Area Agency on Aging (AAA): Your local AAA often has small grant programs or can connect you with volunteer organizations that install grab bars and ramps at no cost.
- VA Grants: Veterans may qualify for the Specially Adapted Housing (SAH) grant or the Home Improvements and Structural Alterations (HISA) grant, which can cover significant modification costs.
- Home equity: A home equity line of credit (HELOC) can fund larger projects, and the interest may be tax-deductible if used for home improvements. Consult your tax advisor.
The National Institute on Aging also maintains a comprehensive resource list for finding local assistance programs tailored to older homeowners.
The Modifications That Deliver the Biggest Impact for the Least Money
Not everything has to be a major project. In my experience, the modifications that make the most immediate difference are often the simplest and cheapest. If you’re on a tight budget, start here:
- Remove throw rugs — free
- Add non-slip strips to bathtub or shower floor — under $15
- Install lever-style door handles (replacing round knobs) — $10 to $25 each
- Brighten all high-traffic areas with higher-wattage LED bulbs — $2 to $5 per bulb
- Secure handrails on all staircases (tighten existing or add new) — $50 to $200
- Add a raised toilet seat — $25 to $60
- Install a grab bar by the toilet and in the shower — $100 to $250 each, professionally installed
You could complete every item on this list for under $500 and dramatically reduce your fall risk. That’s not a renovation — it’s a weekend project with life-changing potential.
Don’t Wait for the Crisis
Here’s the most important piece of advice I can offer after 16 years of writing about how people live well as they age: the best time to modify your home to age in place is before you urgently need it. Making changes proactively — while you’re healthy, clear-headed, and able to oversee the work — is infinitely easier and less expensive than scrambling after a fall or a health scare.
A 2023 study published in the journal BMC Geriatrics found that older adults living in homes with age-friendly modifications reported significantly higher well-being scores and lower rates of depressive symptoms compared to those in unmodified homes. The physical changes mattered, yes. But so did the psychological effect — the confidence that comes from knowing your home is working with you, not against you.
Staying active and maintaining healthy aging habits that actually work after 60 goes hand in hand with living in a safe environment. Your home should support the life you’re building, not limit it.
Start with one room. Start with one grab bar. Start with removing that loose rug in the hallway you’ve been stepping over for years. The point isn’t to do everything at once — it’s to begin. Your future self will thank you for every single modification you make today.
About Jennifer Adams, 16 Years in Lifestyle Journalism
Jennifer Adams is a lifestyle journalist with 16 years of experience writing about travel, hobbies, relationships, home life, and the art of aging well. She has contributed to national publications focused on the interests and aspirations of adults over 50 — from budget-friendly travel destinations to rediscovering hobbies in retirement. At Daily Trends Now, Jennifer writes warm, practical articles that celebrate life after 50 and help readers make the most of every chapter.