

The $1,500 Question Most Homeowners Get Wrong
Here’s a statistic that should stop every homeowner over 50 in their tracks: according to the AARP, 77% of adults aged 50 and older want to remain in their current home as they age — yet fewer than 10% of America’s 140 million housing units are aging-ready. That gap isn’t just a policy talking point. It’s a personal crisis waiting to happen for millions of people who assume their home will serve them well into their 70s, 80s, and beyond without a single change.
What surprises most of my clients is the price tag — or rather, how small it can be. In my 14 years as a Certified Aging-in-Place Specialist, I’ve walked through hundreds of homes and developed modification plans that come in well under $1,500 total. The trick isn’t spending more. It’s spending strategically on the modifications that actually prevent injury and preserve independence.
Let me walk you through exactly how to set up your home to age in place without breaking the bank — and why the order in which you tackle these projects matters more than most people realize.
Why Most Homes Fail the Aging-in-Place Test
The typical American home was designed for a 30-year-old at peak mobility. Narrow doorways, step-over tub entries, slippery tile, dim hallways, and two-story layouts create an obstacle course that becomes genuinely dangerous as balance, vision, and strength change over time.
The National Council on Aging reports that one in four Americans aged 65 and older falls each year, and falls remain the leading cause of injury-related death in that age group. The Centers for Disease Control and Prevention pegs the annual medical cost of falls at over $50 billion. What I see most often is that the fall doesn’t happen during some dramatic event — it happens at 2 a.m. on the way to the bathroom, or stepping out of a shower with no grab bar.
A full-scale home renovation can run $25,000 to $100,000. But the data tells a different story about what actually prevents injury. A targeted, evidence-based approach — focusing on the highest-risk zones first — can be done for a fraction of that cost. For a deeper look at why American homes are so poorly prepared, I recommend our previous analysis on why most homes aren’t ready for aging in place and how to fix yours.
The $1,500 Aging-in-Place Budget: Where Every Dollar Goes
I developed this budget framework after analyzing which modifications deliver the highest safety return per dollar spent. The numbers below reflect 2025 retail pricing for materials plus basic installation where a professional is recommended. If you’re handy, your costs drop further.
| Modification | Estimated Cost | Primary Benefit | DIY Feasible? |
|---|---|---|---|
| Grab bars (bathroom, 3–4 bars) | $150–$300 | Fall prevention in highest-risk zone | Yes, with stud finder |
| LED motion-sensor nightlights (6–8 units) | $40–$70 | Nighttime navigation safety | Yes |
| Lever-style door handles (5–7 doors) | $75–$140 | Arthritis-friendly access | Yes |
| Non-slip adhesive treads (stairs & tub) | $30–$60 | Slip and fall reduction | Yes |
| Handheld showerhead with slide bar | $50–$120 | Seated bathing capability | Yes |
| Raised toilet seat with handles | $40–$80 | Easier sit-to-stand transition | Yes |
| Threshold ramps (1–2 doorways) | $30–$80 | Trip hazard elimination | Yes |
| Smart doorbell with camera | $80–$150 | Security without rushing to the door | Yes |
| Cabinet D-pull handles (kitchen, 8–10) | $40–$80 | Easier grip for daily tasks | Yes |
| Professional grab bar install (if needed) | $100–$200 | Ensures proper anchoring | N/A |
Total estimated range: $635–$1,280. That leaves room in a $1,500 budget for one or two additional items tailored to your specific home — maybe a shower bench, an extra handrail, or a smart home speaker for voice-activated emergency calls.
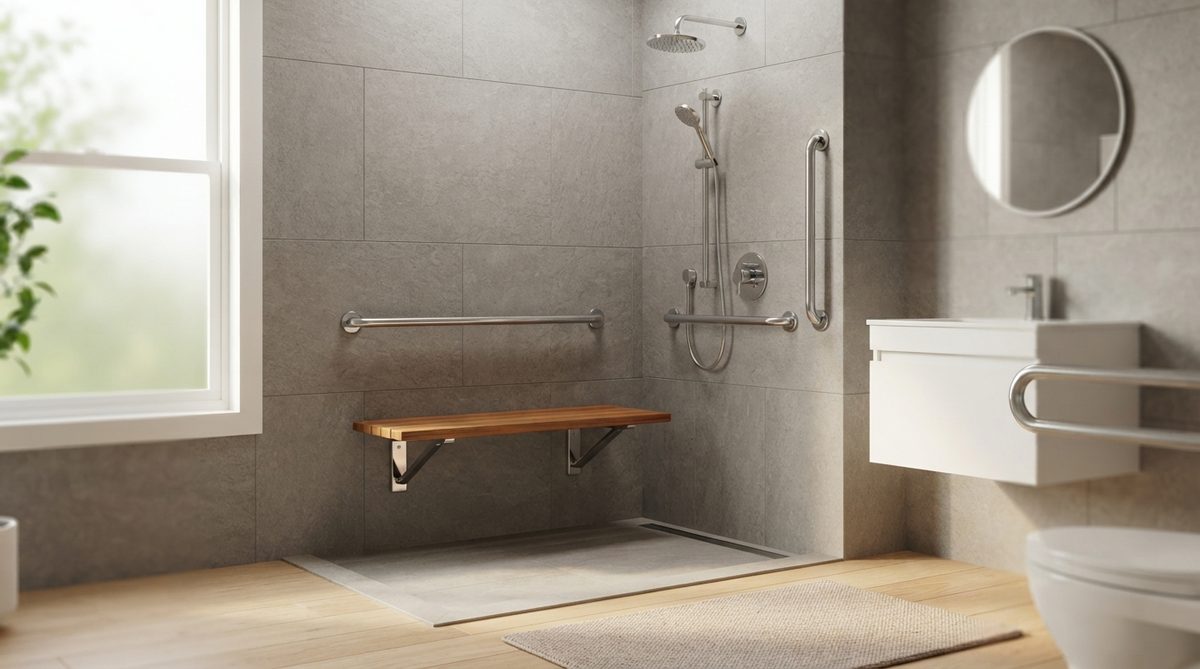
The Bathroom: Your Most Dangerous Room
If you only have $300 to spend on your entire home, spend it in the bathroom. Period. The CDC data is unambiguous: more than 80% of fall-related injuries among older adults at home involve the bathroom. Wet surfaces, confined spaces, awkward transitions from sitting to standing — it’s a perfect storm.
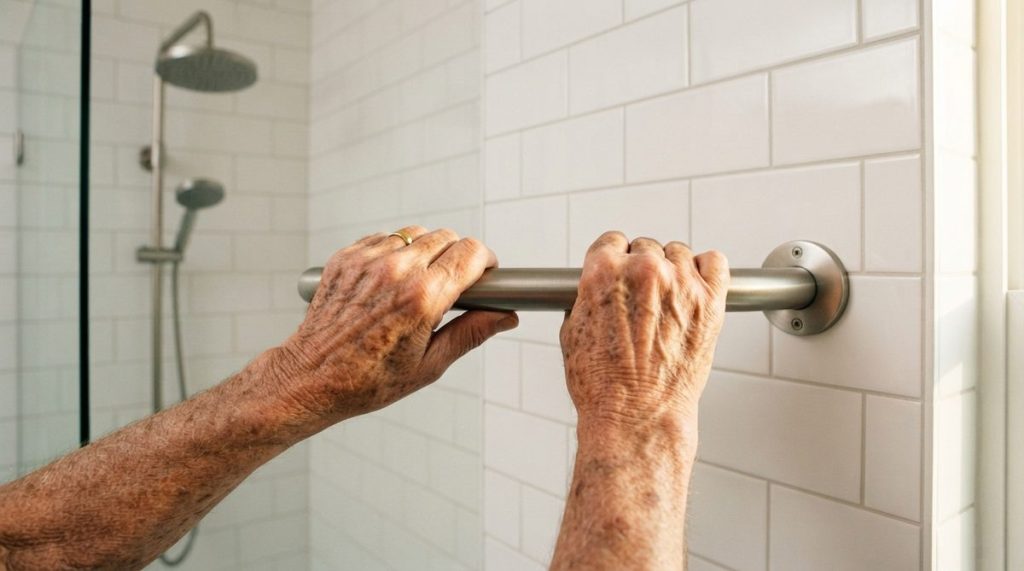
Grab Bars Are Non-Negotiable
I often tell my clients that grab bars are the seatbelts of the home. You don’t wait until after the accident to install them. Place one inside the shower or tub (horizontal, about 34–36 inches from the floor), one on the wall next to the toilet, and one near the shower entry point. Suction-cup models are tempting but unreliable — they fail without warning. You want bars anchored into wall studs or secured with toggle bolts rated for 250+ pounds.
The Shower and Tub Transition
A handheld showerhead on a slide bar costs between $50 and $120 and instantly allows seated bathing if mobility changes. Pair it with a sturdy shower bench or chair ($35–$70). If your tub has a high lip, non-slip adhesive strips inside the tub and a small step stool with a handle outside the tub can reduce risk significantly while you save for a future curbless shower conversion.
A raised toilet seat with integrated armrests ($40–$80) solves one of the most common complaints I hear: difficulty rising from a standard-height toilet. This single item can prevent knee and hip strain that compounds over time.
Lighting: The Cheapest Lifesaver in Your Home
Diminished contrast sensitivity and depth perception are normal parts of aging vision. The National Institute on Aging notes that a 60-year-old needs roughly three times more light than a 20-year-old to see the same details. Yet most homes are lit for younger eyes.
LED motion-sensor nightlights — placed in hallways, bathrooms, staircases, and the bedroom — cost about $7–$12 each and eliminate the single most common scenario I encounter in fall incident reviews: a nighttime trip to the bathroom in the dark. Place them at baseboard level to illuminate the floor path without creating glare that disrupts sleep.
During the day, swap any dim bulbs for higher-lumen LEDs (aim for 800–1,100 lumens in living spaces). This costs almost nothing if you’re replacing bulbs as they burn out anyway, and the improvement in spatial awareness is immediate.

Flooring and Thresholds: Eliminate Trip Hazards for Under $100
Loose throw rugs are responsible for a staggering number of falls. I’ve seen estimates suggesting they contribute to 38% of trip-and-fall incidents among adults over 65. My recommendation: remove all throw rugs that aren’t secured with industrial-grade carpet tape or rubberized backing. If you love a particular rug, invest $10 in a non-slip rug pad cut to size.
Threshold ramps — small wedge-shaped pieces of rubber or aluminum — eliminate the lip between rooms with different flooring heights. They cost $15–$40 each and can be critical if you ever need a walker or wheelchair. Even without mobility aids, that half-inch height change between hardwood and tile is a stumble risk most people don’t notice until they’ve tripped on it.
Stairs Demand Extra Attention
If you have interior stairs, add non-slip adhesive treads to each step and make sure at least one handrail is present and solidly mounted. If only one side has a rail, adding a second rail costs $50–$150 depending on length and material. I advise clients to also apply a contrasting color strip to the edge of each step — it dramatically improves depth perception on stairs, especially in low light.
Kitchen Modifications That Cost Almost Nothing
The kitchen is the second-most-used room and presents risks from reaching, bending, and handling hot surfaces. Swapping round cabinet knobs for D-pull handles (about $5 each) makes a meaningful difference for hands affected by arthritis or reduced grip strength.
- Move frequently used dishes, pots, and pantry staples to counter-height shelves or lower cabinets to minimize overhead reaching.
- Add a lazy Susan to deep corner cabinets so items rotate forward rather than requiring you to lean in.
- Use a reacher/grabber tool ($12–$15) for high shelves instead of a step stool.
- Install under-cabinet LED strip lights ($15–$25) to illuminate countertop work areas and reduce shadow-related knife mishaps.
None of these changes requires a contractor. Collectively, they reduce strain and accident risk in a room you likely use multiple times a day.
Smart Home Tech: Security and Communication Under $200
A smart doorbell camera ($80–$150) lets you see and speak with visitors without rushing to the door — rushing that can cause slips or falls. Pair it with a voice-activated smart speaker ($30–$50) that can make phone calls, set medication reminders, and even call 911 in an emergency.
For those concerned about online safety with new connected devices, it’s worth reviewing this cybersecurity guide for older adults before connecting new tech to your home network. These tools are powerful, but only if set up securely.
What This Budget Doesn’t Cover — and When to Plan for More
Let me be transparent about the limitations of a $1,500 budget. It will not cover major structural changes like widening doorways (typically $300–$1,000 per doorway), converting a tub to a walk-in shower ($2,500–$8,000), installing a stairlift ($2,000–$5,000), or adding a first-floor bedroom or bathroom ($15,000+).
What it does cover are the evidence-based, high-impact modifications that address the most statistically common causes of injury at home. Think of this as Phase 1 — the changes that buy you time and safety while you plan (and save) for larger projects if they become necessary.
It’s also worth considering how your overall financial strategy supports long-term aging in place. Home modifications are one piece; managing retirement income wisely is another. If you’re navigating Medicare cost adjustments, our piece on how retirees can manage income to avoid higher IRMAA in 2026 breaks down a often-overlooked cost that can eat into your modification budget.
The Modification That Costs Zero Dollars
I always end my home assessments with the same advice: declutter the pathways. Clear walking routes through every room so there’s at least 36 inches of unobstructed space. Move electrical cords away from walkways. Push furniture against walls. Remove that magazine rack by the hallway, the boots by the back door, the stack of books near the stairs.
This zero-cost step prevents more falls than any single product you can buy. A 2023 analysis published in the Journal of the American Geriatrics Society found that home hazard reduction — primarily clutter removal and improved lighting — reduced fall rates by 26% among adults aged 65 and older. That’s a better outcome than many pharmaceutical interventions.
Physical Readiness: The Other Half of Aging in Place
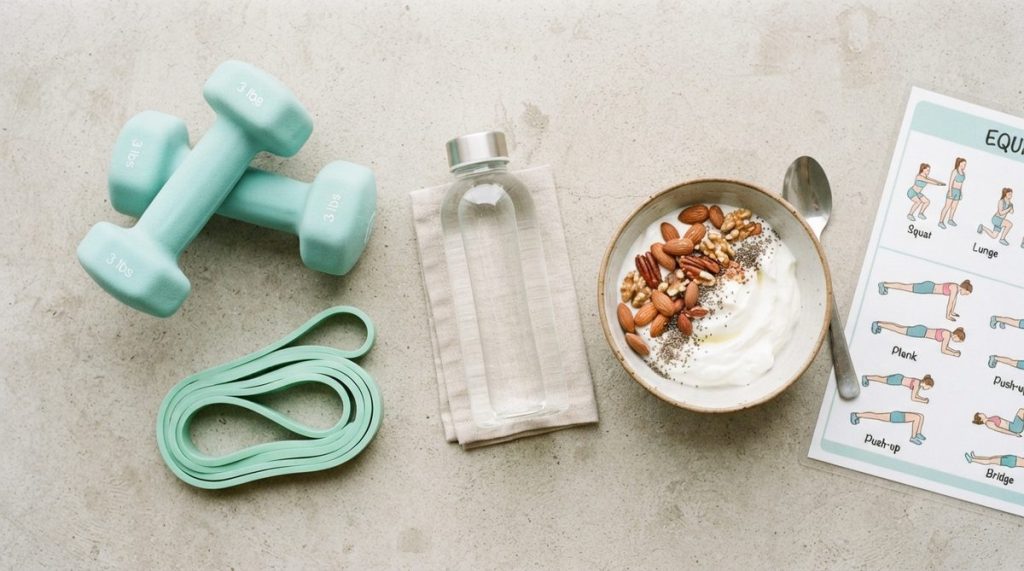
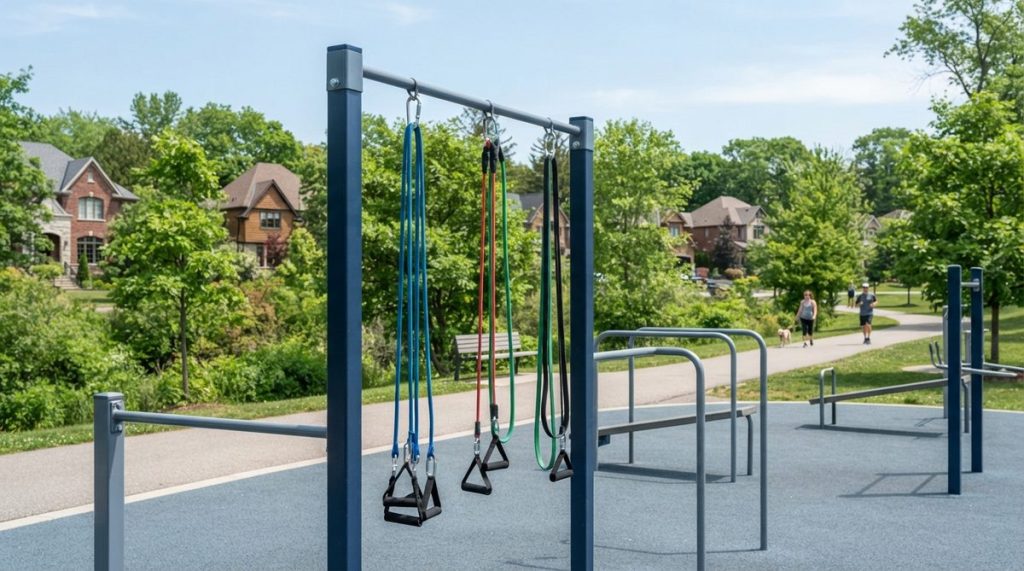
No amount of grab bars can substitute for maintaining the strength and balance that keep you upright in the first place. I always encourage my clients to pair home modifications with a consistent strength-training routine. Even light resistance work improves the muscle response time that prevents a stumble from becoming a fall. If you’re unsure where to begin, this piece on resistance training myths for seniors is a solid starting point.
Aging in place isn’t a single project — it’s a strategy. The $1,500 you spend today on targeted modifications buys something money can’t easily replace later: years of safe, comfortable independence in the home you already love. Start with the bathroom. Add the lighting. Remove the clutter. And if you can do one thing this weekend, go buy three grab bars. Your future self will thank you.
Frequently Asked Questions
What is the most important aging-in-place modification I can make on a tight budget?
Installing grab bars in the bathroom is the single highest-impact modification for the money. The bathroom is the site of over 80% of fall-related injuries among older adults at home, and properly anchored grab bars cost between $50 and $100 for a set of three, with professional installation adding $100–$200 if needed.
Can I set up my home to age in place without hiring a contractor?
Yes, the majority of modifications in a $1,500 aging-in-place budget are DIY-friendly. Items like motion-sensor nightlights, lever door handles, non-slip treads, raised toilet seats, and handheld showerheads can be installed with basic tools. Grab bars are the one item where professional installation is recommended if you're not confident locating wall studs and anchoring into them securely.
At what age should I start making aging-in-place modifications to my home?
The best time to start is in your 50s, well before any mobility or balance issues arise. Making modifications proactively is far less expensive and stressful than doing so after an injury. Many Certified Aging-in-Place Specialists, including myself, recommend a professional home assessment around age 55 to create a phased plan that spreads costs over several years.
About Marcus Bell, Certified Aging-in-Place Specialist (CAPS)
Marcus Bell is a Certified Aging-in-Place Specialist (CAPS) with 14 years of experience helping American seniors create safer, more comfortable living environments. He has consulted on hundreds of home modifications — from bathroom safety upgrades to smart home installations — and writes extensively about the products, services, and strategies that help older adults live independently for longer. At Daily Trends Now, Marcus covers home improvement, aging-in-place solutions, gardening, and practical lifestyle tips for seniors.