

Why Home Modifications for Aging in Place Matter More Than Ever
Here’s a number that stopped me in my tracks when I first encountered it years ago, and it still resonates today: according to AARP, roughly 77% of adults aged 50 and older want to remain in their current home as they age. Yet fewer than 10% of American homes are equipped with the basic accessibility features needed to make that possible.
In my 14 years as a Certified Aging-in-Place Specialist, that gap between desire and readiness is what keeps me busy. I’ve walked through hundreds of homes with clients who love their neighborhood, their garden, their memories — but whose houses quietly became obstacle courses as mobility or balance changed.
The good news? Most home modifications for aging in place aren’t dramatic gut renovations. They’re targeted, strategic upgrades that dramatically reduce fall risk, preserve independence, and often cost far less than a single year of assisted living (which averages about $54,000 annually, per the National Council on Aging).
Below, I’ll walk you through seven essential modifications, what each one really costs in 2025, and the order I typically recommend to clients working within a budget.
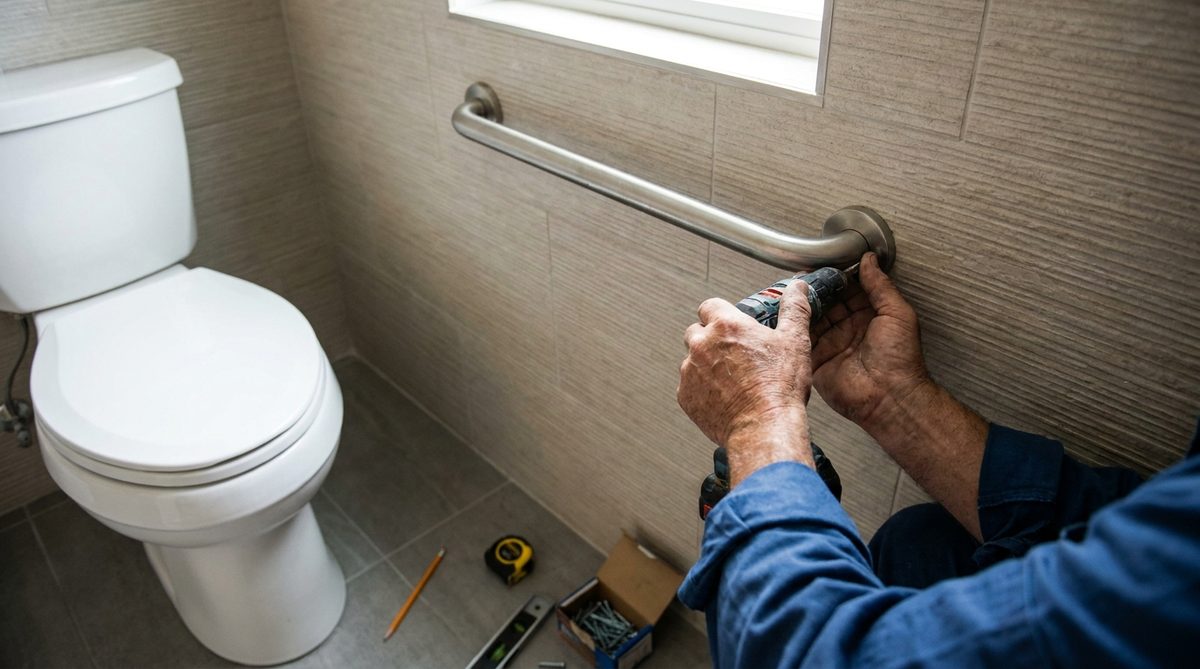
1. Bathroom Grab Bars and Safety Accessories
Why this is modification #1
I always tell my clients: if you can only afford one project this year, make it the bathroom. The CDC reports that roughly 235,000 people over age 15 visit emergency rooms annually due to bathroom injuries, and adults over 65 account for a disproportionate share. Wet tile, small spaces, and awkward transitions from sitting to standing create a perfect storm.
Professional-grade grab bars mounted into wall studs — not the suction-cup versions you find at big-box stores — cost between $50 and $250 per bar, including installation. I recommend at least three: one inside the shower or tub, one near the toilet, and one at the bathroom entrance.
Additional bathroom upgrades worth considering
A raised toilet seat ($30–$80) and a non-slip bath mat with proper adhesive backing ($20–$40) round out the basics. For a more thorough look at technology that pairs well with these physical modifications, check out 7 Tech Devices That Help Seniors Age in Place Safely.
“The average cost of installing grab bars throughout a single bathroom is $300 to $750 — roughly 0.5% of what one year of assisted living costs. That’s the single best return on investment I know of in home safety.”
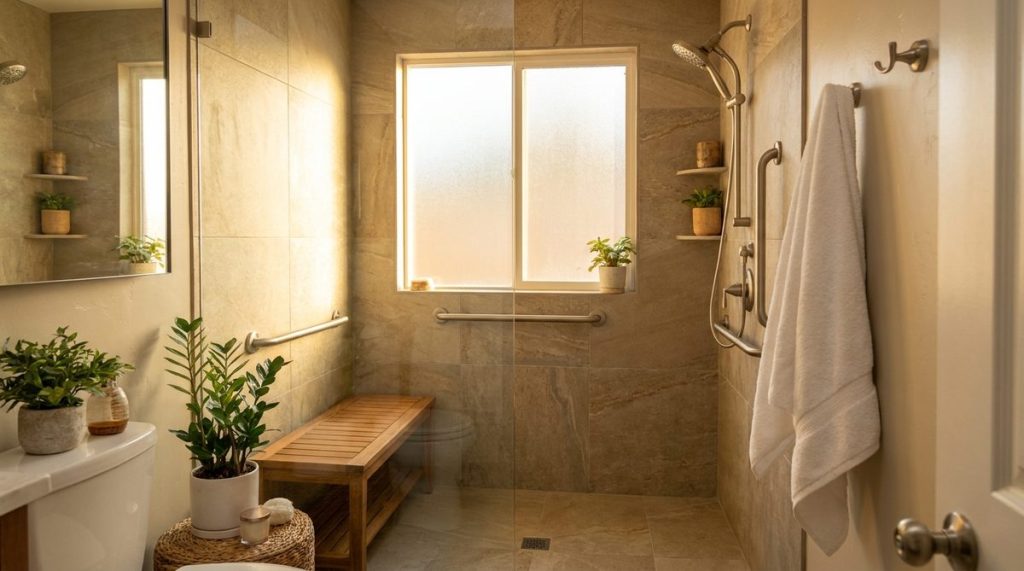
2. Walk-In Shower or Zero-Threshold Conversion
Stepping over a traditional tub wall is the movement I see cause the most anxiety in my assessments. A zero-threshold (curbless) shower eliminates that barrier entirely, allowing easy entry whether you’re walking independently, using a cane, or eventually need a wheelchair.
Full tub-to-shower conversions typically run between $3,000 and $8,000, depending on plumbing complexity, tile choices, and your local labor market. Prefabricated walk-in shower kits can bring the price closer to $1,500–$4,000 installed. Either option should include a built-in bench or fold-down seat and a handheld showerhead on a slide bar — two features that cost minimal extra but make a huge difference in daily comfort.
If budget is tight, even installing a sturdy transfer bench ($50–$150) across an existing tub can serve as a meaningful interim step while you save for the full conversion.
3. Improved Lighting Throughout the Home
The overlooked modification
What I see most often is homes where every major safety feature is in place, yet the hallway between the bedroom and bathroom is dim at 2 a.m. Falls don’t only happen during big activities — they happen during routine nighttime trips.
The National Institute on Aging emphasizes that adequate lighting is one of the simplest fall-prevention strategies. By age 60, most people need roughly three times more light than they did at age 20 to see the same level of detail.
What to install and what it costs
Motion-activated LED night lights along hallways and staircases cost as little as $10–$25 each. Under-cabinet lighting in kitchens runs $150–$400 for a professional install. Upgrading overhead fixtures to brighter, daylight-spectrum LEDs throughout the home typically totals $200–$600 depending on the number of rooms. The combined investment is modest, but the impact on navigation and confidence is enormous.
4. Stairway Safety Upgrades or Main-Floor Living Conversion
Stairs are the second most common site of fall injuries at home, right behind the bathroom. If your bedroom, a full bathroom, kitchen, and laundry are all on one level, you’re already in a strong position. If not, you have two paths.
Option A: Make stairs safer
Adding continuous handrails on both sides ($200–$600 per staircase), applying high-contrast non-slip treads ($5–$15 per step), and ensuring top and bottom lighting is bright and consistent can significantly reduce stair-related falls. Total cost for a single staircase: approximately $400–$1,000.
Option B: Relocate living to one floor
Converting a main-floor den into a bedroom and adding an accessible half-bath or full bath on the same level is a bigger project — typically $8,000–$25,000 — but it eliminates the stair problem entirely. For clients whose knees, hips, or balance make stairs genuinely dangerous, this is the modification I recommend most emphatically. A stairlift ($2,000–$5,000 installed) is a middle-ground option, though it requires maintenance and doesn’t help if you’re carrying laundry or groceries.
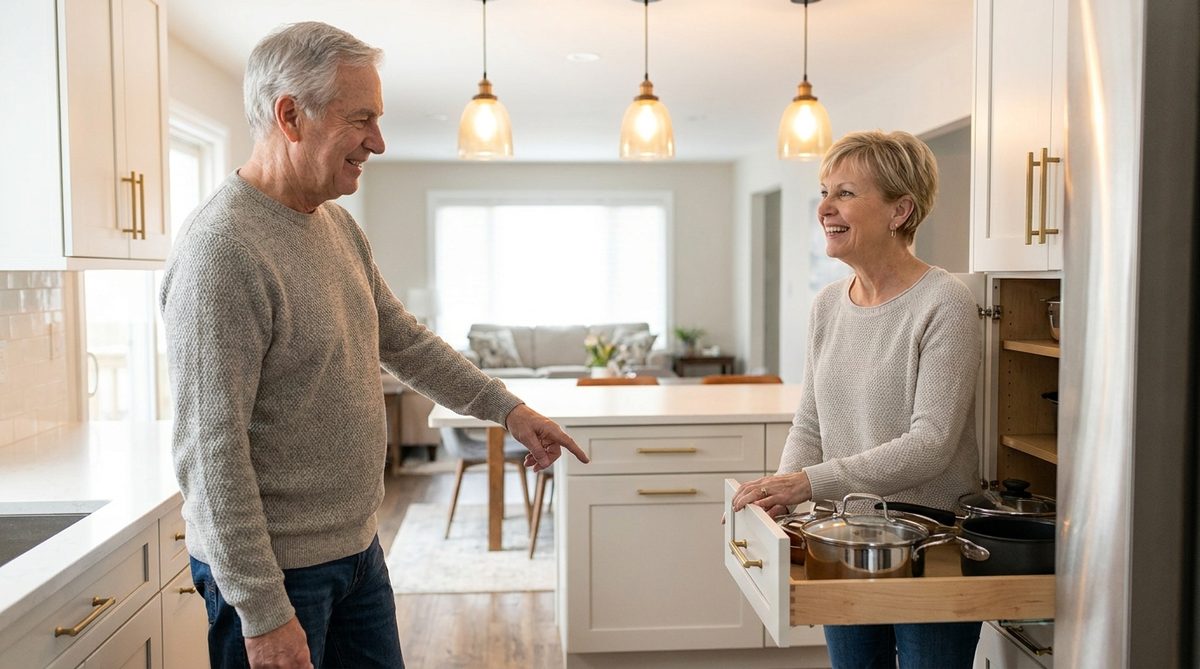
5. Kitchen Accessibility Improvements
Kitchens are where independence feels most personal. Being able to cook your own meals, pour your own coffee, reach your own dishes — that daily autonomy matters deeply. I’ve seen clients tear up when a simple cabinet modification meant they no longer had to ask for help reaching a mug.
High-impact, moderate-cost upgrades
Pull-out shelving and drawer organizers for lower cabinets ($100–$300 per cabinet) reduce the need to bend or reach overhead. D-shaped or lever-style cabinet and faucet handles ($5–$20 each) are far easier on arthritic hands than round knobs. A pull-out cutting board at counter height ($80–$200) gives seated users a functional prep surface.
If you’re planning a larger kitchen remodel, consider lowering a section of countertop to 30–34 inches for seated work and ensuring at least 42 inches of clearance between counters for walker or wheelchair access. These choices align well with broader financial planning for retirement — something covered in depth at Retirees Depleting Savings Faster: 6 Must-Know Moves for 2026.
6. Entryway and Doorway Widening
Standard interior doors in homes built before 1990 are typically 28–30 inches wide. A standard wheelchair requires at least 32 inches of clear passage; 36 inches is the ADA-recommended width and what I specify in every project. Even if you don’t currently use a mobility device, widening doorways now is dramatically cheaper than doing it during an emergency after a hip replacement.
Cost breakdown
Offset hinges (also called swing-clear hinges) are the budget hero here: at $15–$30 per door, they add roughly 2 inches of clearance without any carpentry. If you need full-frame widening, expect $300–$1,000 per doorway depending on whether load-bearing walls are involved. Prioritize the bedroom, bathroom, and main entry first.
For the front entry specifically, a no-step entrance with a gentle ramp (slope ratio of 1:12) costs $1,000–$3,500 for a basic wooden or aluminum ramp. This one project opens your home to visitors with mobility challenges, too — something that strengthens social connection, which research consistently links to healthier aging. For more on that topic, see Aging-in-Place Design Features That Cut Fall Risk by 60%.
7. Smart Home Technology and Emergency Systems
Technology is the modification category that’s evolved most since I earned my CAPS certification. Today’s smart home systems can automate lighting, lock doors remotely, detect falls, and even remind you to take medication — all without looking clinical or institutional.
A quality medical alert system runs $20–$50 per month (or $250–$500 for a purchased device with no monthly fee). Smart speakers that work with voice commands ($30–$100) let you control lights, make calls, and set timers hands-free. Smart door locks with keypad entry ($150–$300) eliminate the fine-motor challenge of traditional keys.
Video doorbells ($100–$250) add a security layer that also prevents unnecessary trips to the front door. When layered together, these technologies create a safety net that complements every physical modification on this list.
“Aging in place isn’t about one big renovation — it’s about layering smart, affordable modifications over time so your home evolves alongside you. Start with safety, then add convenience, then add technology.”
Complete Cost Comparison: All 7 Modifications at a Glance
| Modification | DIY/Budget Cost | Professional Install Cost | Priority Level |
|---|---|---|---|
| Bathroom grab bars & safety accessories | $100–$350 | $300–$750 | Highest |
| Walk-in/zero-threshold shower conversion | $1,500–$4,000 (prefab kit) | $3,000–$8,000 | High |
| Improved lighting (whole home) | $100–$300 | $200–$600 | High |
| Stairway safety or main-floor conversion | $400–$1,000 (stair upgrades) | $8,000–$25,000 (floor conversion) | High (if stairs are daily) |
| Kitchen accessibility improvements | $200–$600 | $500–$3,000 | Medium-High |
| Entryway & doorway widening | $50–$200 (offset hinges) | $300–$3,500 | Medium |
| Smart home tech & emergency systems | $150–$500 | $300–$800 + monthly fees | Medium |
Total range for all seven modifications: As little as $2,500 for budget approaches, up to $40,000+ for comprehensive professional work. Compare that to the national median cost of assisted living — $54,000 per year — and the math speaks for itself.
Where to Start: A Step-by-Step Action Plan
If you’re feeling overwhelmed, here’s the exact sequence I recommend to clients. This prioritizes highest-risk areas first and spreads costs over a manageable timeline.
- Conduct a home safety walk-through. Go room by room with a checklist. The AARP HomeFit Guide (free at aarp.org) is an excellent starting point. Note tripping hazards, poor lighting, and any area where you brace yourself on furniture for balance.
- Install bathroom grab bars and non-slip surfaces immediately. This is a weekend project with the highest safety payoff. Even if you hire a handyperson, it can be done in a single visit.
- Upgrade lighting within the first month. Focus on hallways, staircases, the bathroom path from the bedroom, and the kitchen. Motion-sensor night lights should be placed every 8–10 feet along nighttime routes.
- Address stair safety within 1–3 months. Add handrails, non-slip treads, and proper lighting. If stairs are already causing you to avoid parts of your home, accelerate your timeline for a main-floor living plan.
- Plan your bathroom conversion within 3–6 months. Get at least three quotes. Ask contractors specifically about CAPS certification or universal design experience — not every remodeler understands aging-in-place requirements.
- Tackle kitchen and doorway modifications within 6–12 months. These improve daily quality of life and can often be bundled with other renovation work for cost savings.
- Layer in smart home technology on an ongoing basis. Start with a medical alert device and a smart speaker, then add components as comfort with the technology grows.
Funding Your Home Modifications
Cost is the number-one concern I hear, and it’s valid. But several programs can help offset expenses. Medicaid waiver programs in many states cover home modifications for qualifying individuals. The U.S. Department of Agriculture (USDA) offers Section 504 Home Repair grants of up to $10,000 for low-income homeowners aged 62 and older. Some Area Agencies on Aging coordinate volunteer labor for basic installations like grab bars.
Veterans may qualify for the VA’s Specially Adapted Housing (SAH) or Home Improvements and Structural Alterations (HISA) grants. And if you’re considering tapping home equity, understanding your full financial picture is critical — especially with changing cost-of-living adjustments on the horizon, which you can read more about at Social Security COLA 2027: What Retirees Must Know Now.
The Bigger Picture: Your Home Should Work for You
I often tell my clients that home modifications for aging in place aren’t an admission that something is wrong. They’re a declaration that you intend to stay in control of your life, in the place you’ve chosen, for as long as possible. That’s not a concession — it’s a power move.
The homes we love weren’t designed with our 70-year-old selves in mind. But with targeted upgrades — most of which are surprisingly affordable — they absolutely can be. Start with the bathroom, improve the lighting, and build from there. Your future self will thank you for every grab bar, every motion sensor, and every widened doorway.
The best time to make these changes was five years ago. The second-best time is this weekend.
About Marcus Bell, Certified Aging-in-Place Specialist (CAPS)
Marcus Bell is a Certified Aging-in-Place Specialist (CAPS) with 14 years of experience helping American seniors create safer, more comfortable living environments. He has consulted on hundreds of home modifications — from bathroom safety upgrades to smart home installations — and writes extensively about the products, services, and strategies that help older adults live independently for longer. At Daily Trends Now, Marcus covers home improvement, aging-in-place solutions, gardening, and practical lifestyle tips for seniors.